
Manual / Getting Started
Try It Out
See OpenFollow work in about ten minutes, without a camera, a stage or a console. A fresh station boots with a sample stage picture, a calibrated grid and marker 1 ready to move.
What you need
- Raspberry Pi 5 with a power supply and a microSD card (16 GB or larger)
- An HDMI display
- A USB keyboard or a USB-wired gamepad
- A Mac or PC where you can run Raspberry Pi Imager
- Optional: a network cable to your LAN, for the web interface and PSN
A Compute Module 5 works the same way; flashing its eMMC is described in Installation → Compute Module 5.
1. Flash and boot
- In the Download section of this website, choose For Raspberry Pi 5 and download the Raspberry Pi 5 Image (
openfollow-pi5_<version>.img.xz). - In Raspberry Pi Imager: Choose OS → Use custom, select the file, Choose Storage → the microSD card → Write.
- Insert the card, connect the display, keyboard or gamepad and network, then power on.
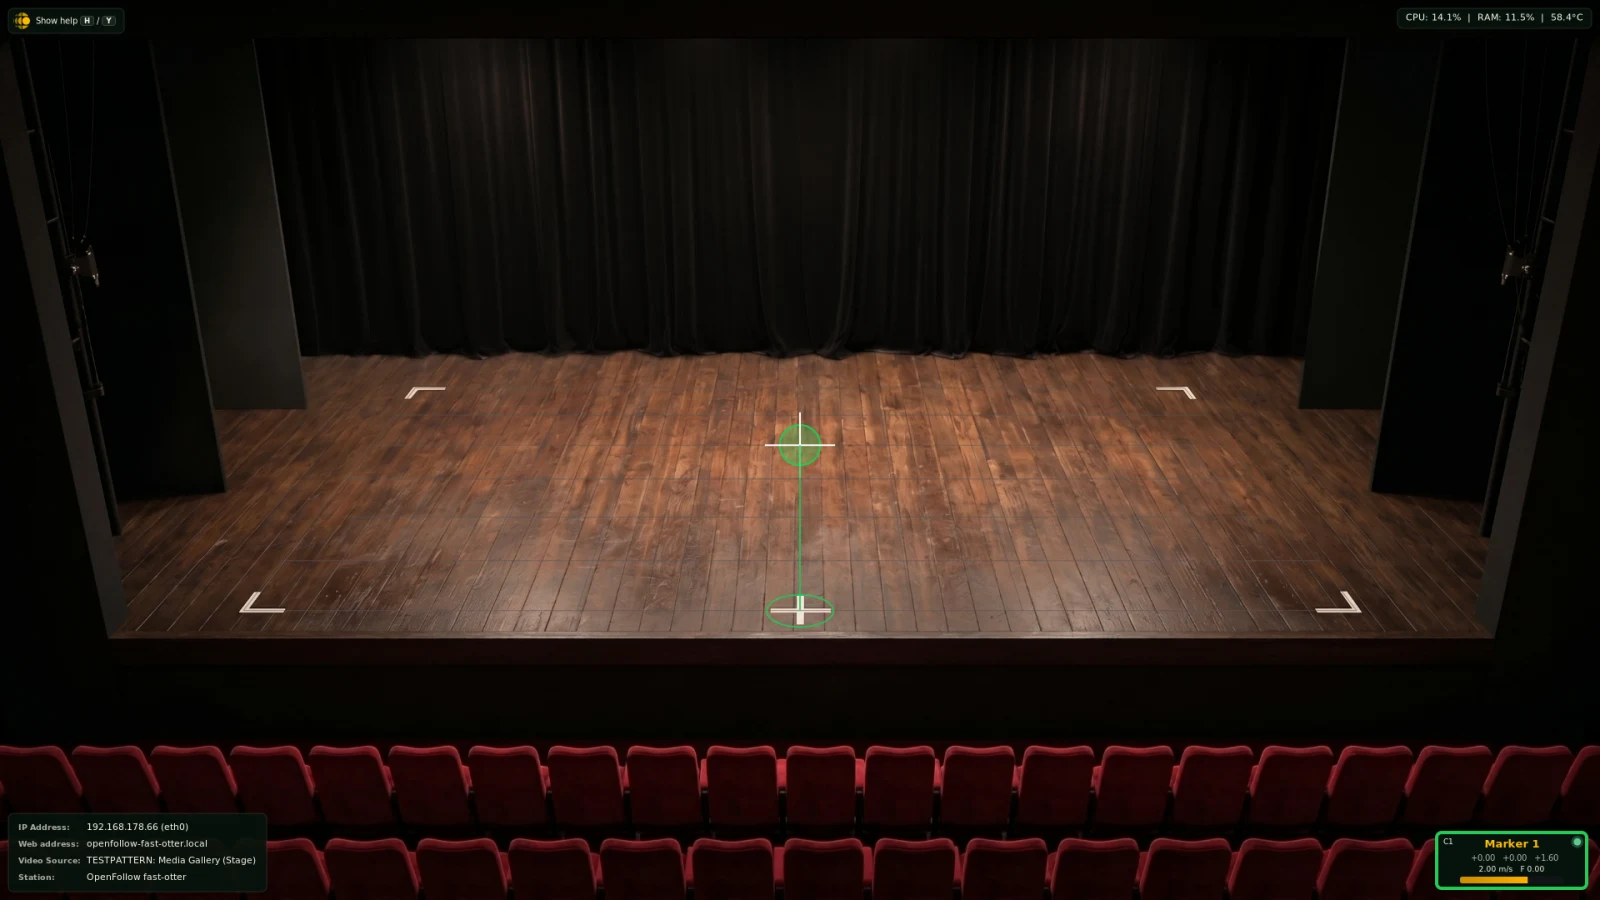
The Pi boots straight into the Operator Screen: the Stage scene from the built-in Media Gallery, the grid on its floor and marker 1. The panel in the bottom-left corner shows the station’s IP Address.
2. Move the marker
Steer marker 1 with a USB-wired gamepad, such as an Xbox1 or PlayStation2 controller, or the keyboard of the station. Choose yours:
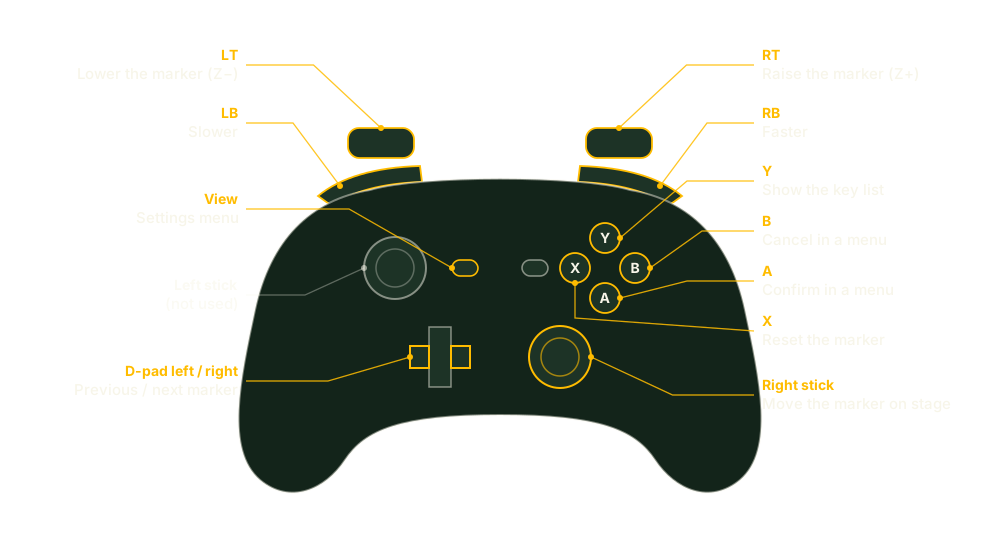
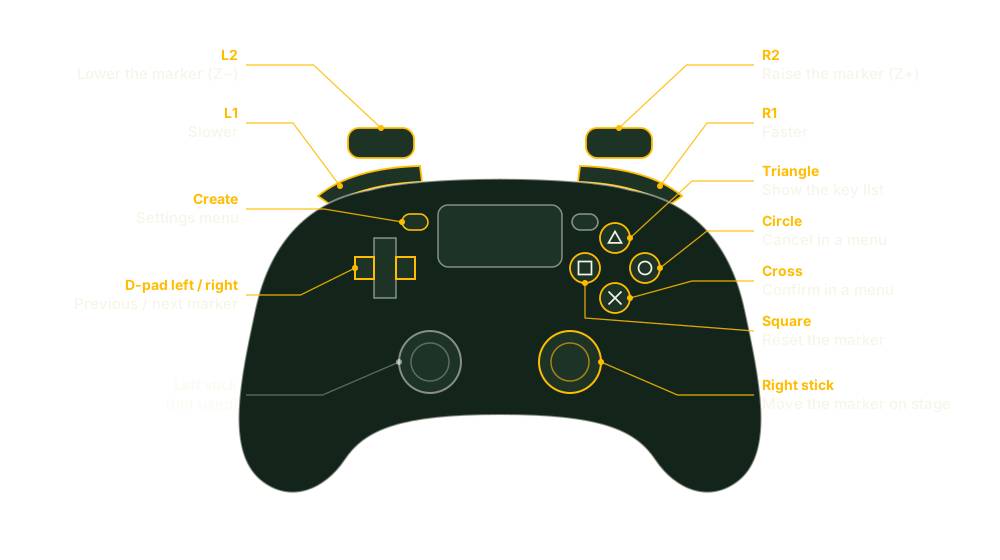
| Action | Key |
|---|---|
| Move across the stage | W A S D |
| Raise / lower the marker (Z) | Q / E |
| Slower / faster | R / T |
| Back to the start position | X |
| Show the key list | H |
| Settings menu | M |
The marker card shows the position in metres from the Reference Point, which in the Stage scene is the middle of the grid’s downstage edge. Every position OpenFollow sends is measured from there.
A gamepad that doesn’t respond is usually wireless or not in XInput mode – see Gamepad not detected.
3. Open the web interface
On a computer on the same network, browse to http://<IP Address> from the Operator Screen. The Overview tab lists this station under Station Network. All settings live here; the Web Interface chapter tours the tabs.
If the page doesn’t open, check that both devices are on the same subnet. A network without DHCP needs an address set on the station: press M (gamepad: BACK) for the Settings menu, then Network Interfaces.
4. See the PSN data
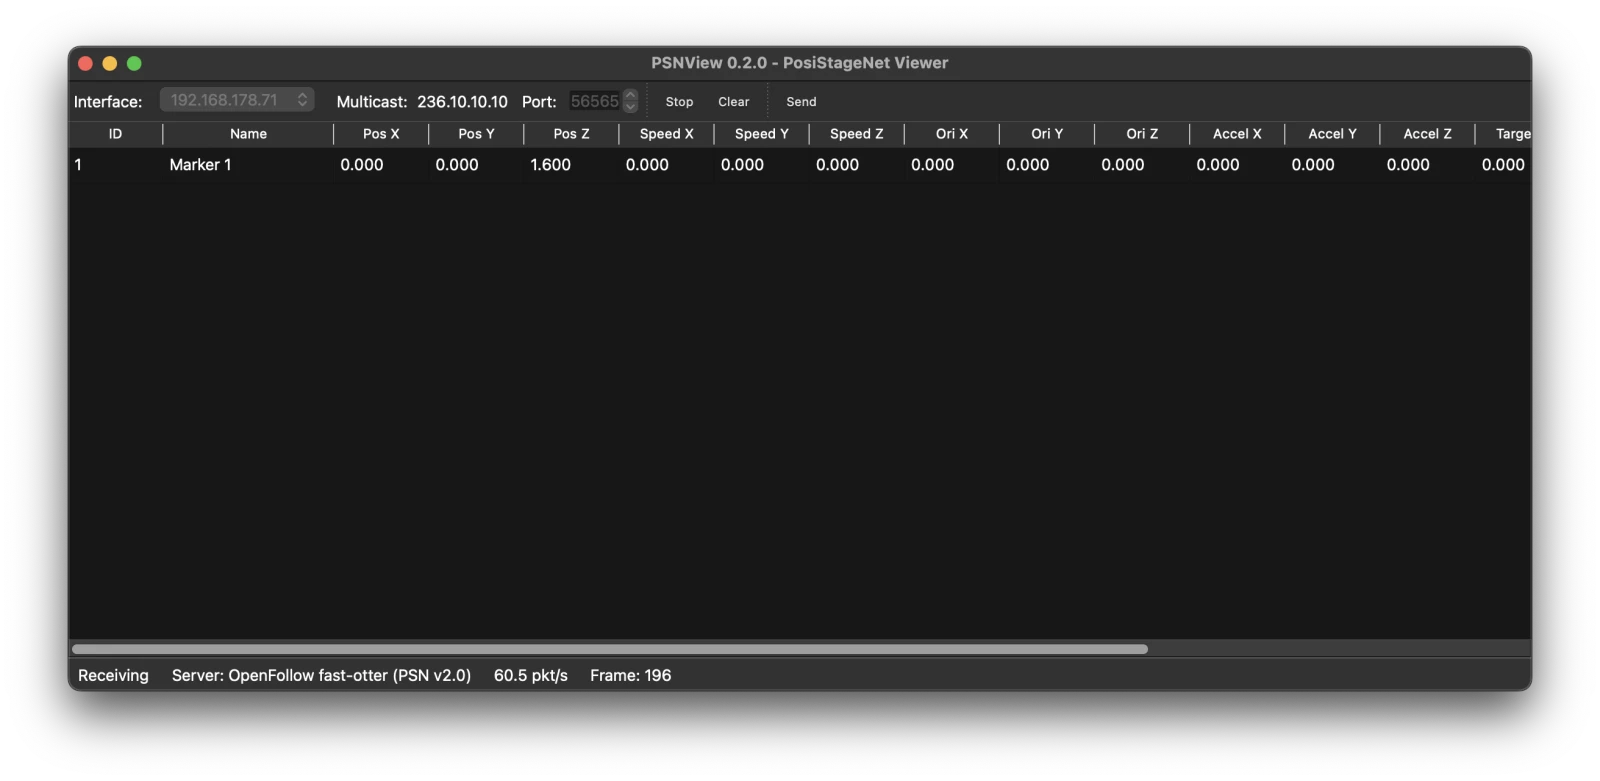
The station sends marker 1 as PSN from the moment it boots, on multicast group 236.10.10.10, port 56565.
- With a console: add a PSN input on a console in the same subnet – grandMA3, ChamSys MagicQ and Hog 5 accept PSN – and move the marker. The position updates at about 60 Hz.
- Without a console: run PSNView by OpenFollow on your Mac or PC (macOS, Windows and Linux) and pick the network interface that reaches the station. Marker 1 appears with its position as you move it.
ETC Eos takes positions over OSC instead of PSN; see Move lights with ETC Eos.
5. Practise a calibration
The Stage picture has a taped 10 × 6 m rectangle on the floor, so you can run the Setup Wizard before you have a camera. Open Camera & Grid → Open Setup Wizard.
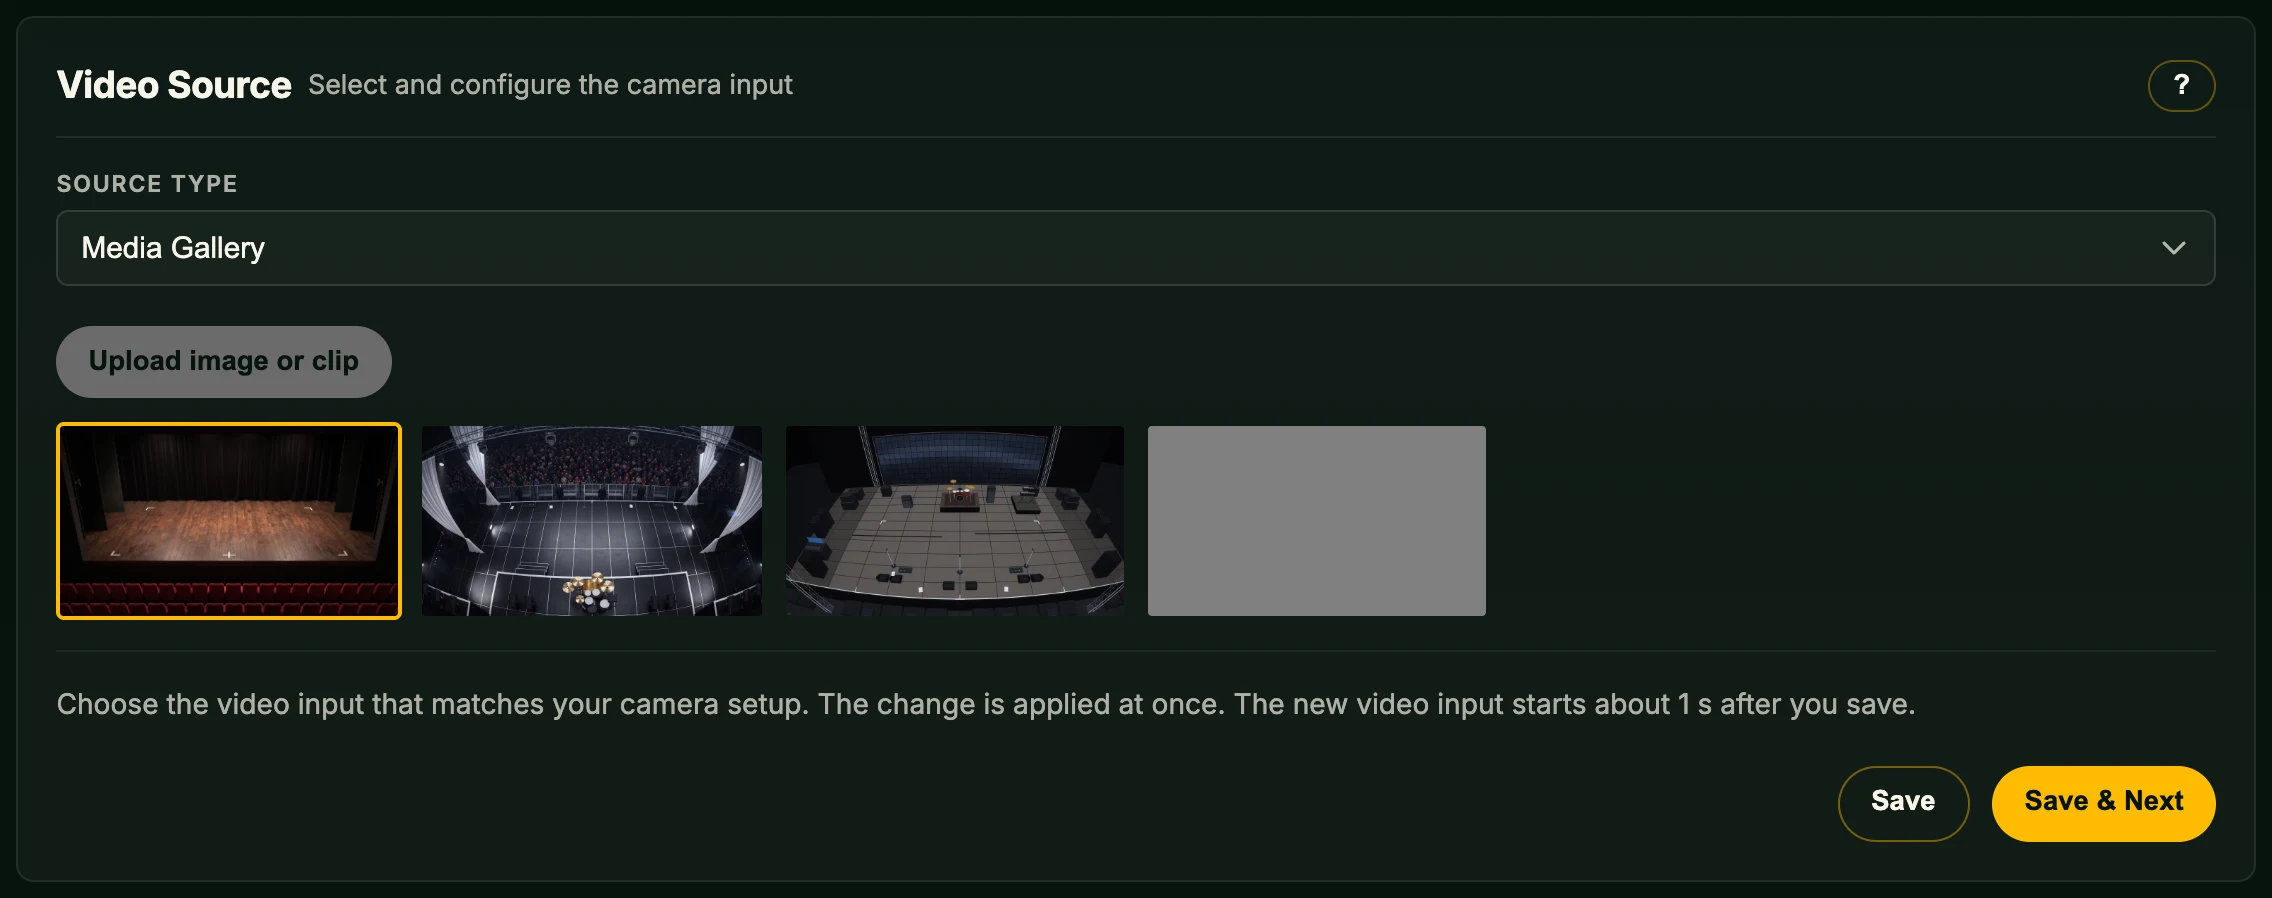
Video Source
Keep Media Gallery with the Stage tile selected and click Save & Next.
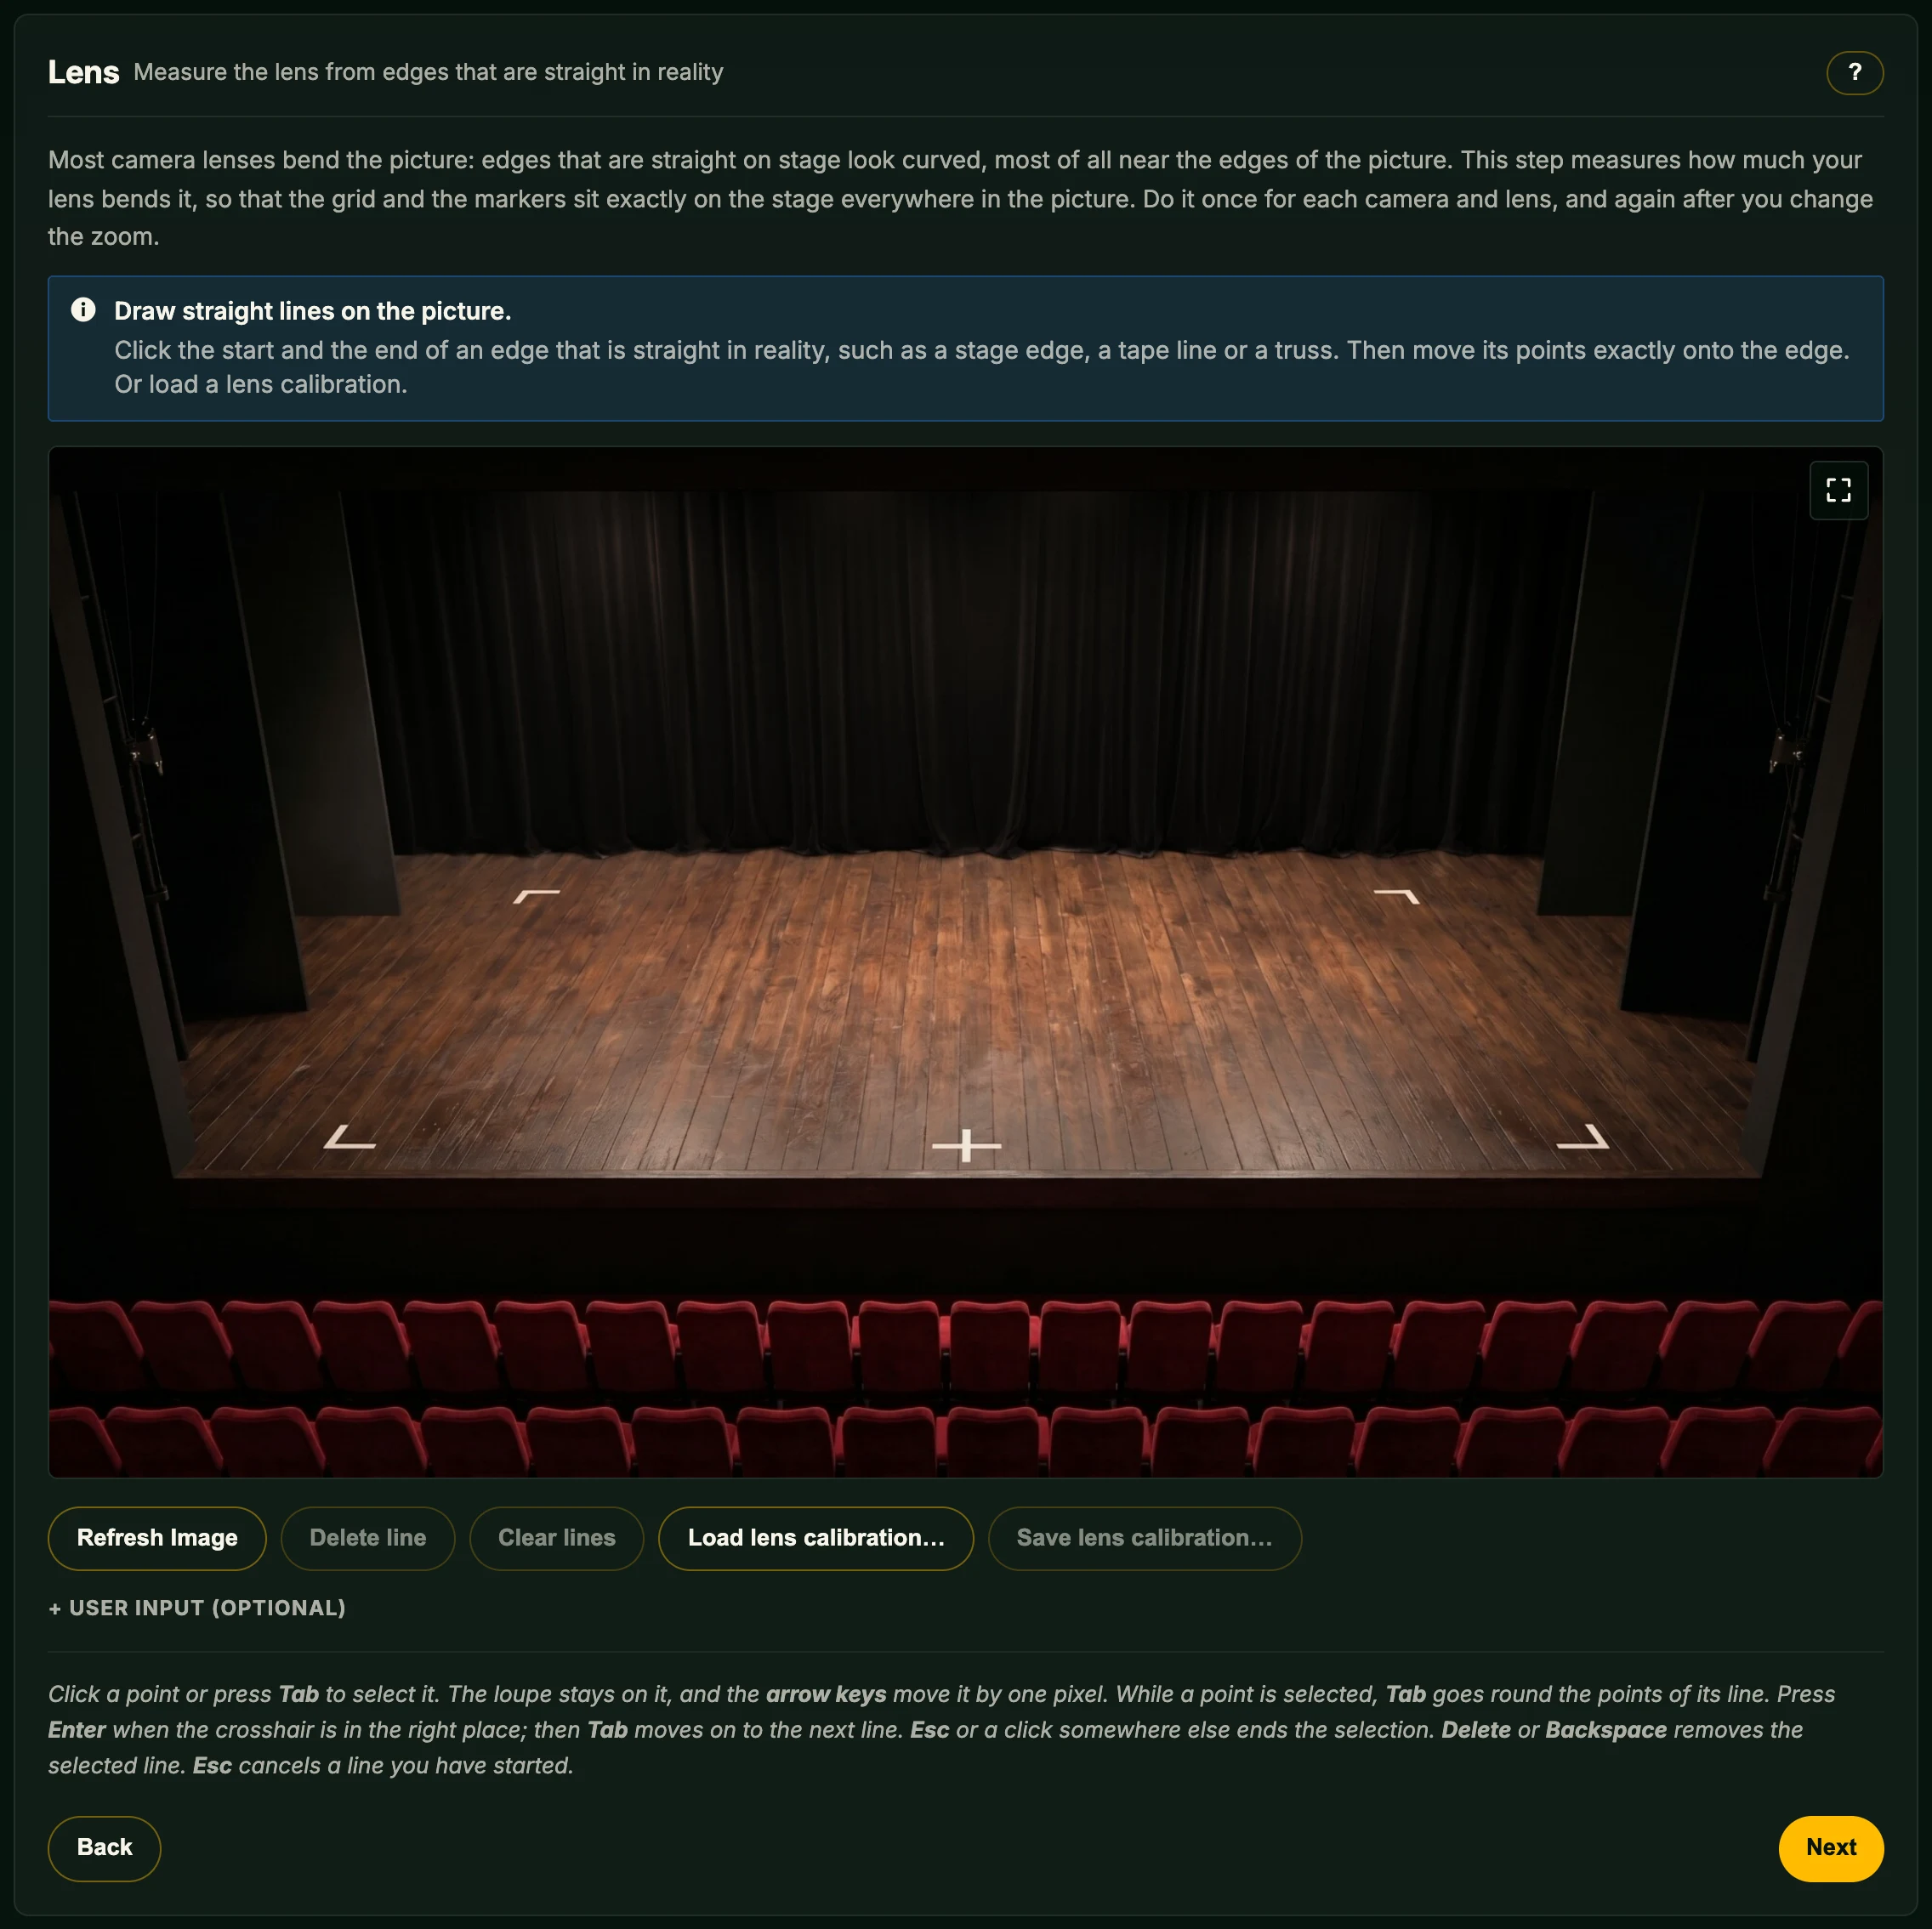
Lens
The Stage picture has no lens distortion, so there is nothing to measure: click Next without drawing lines.
A station that was calibrated before first shows This camera has a lens calibration with three options. Choose Clear it and measure the lens again, then click Next without drawing lines.
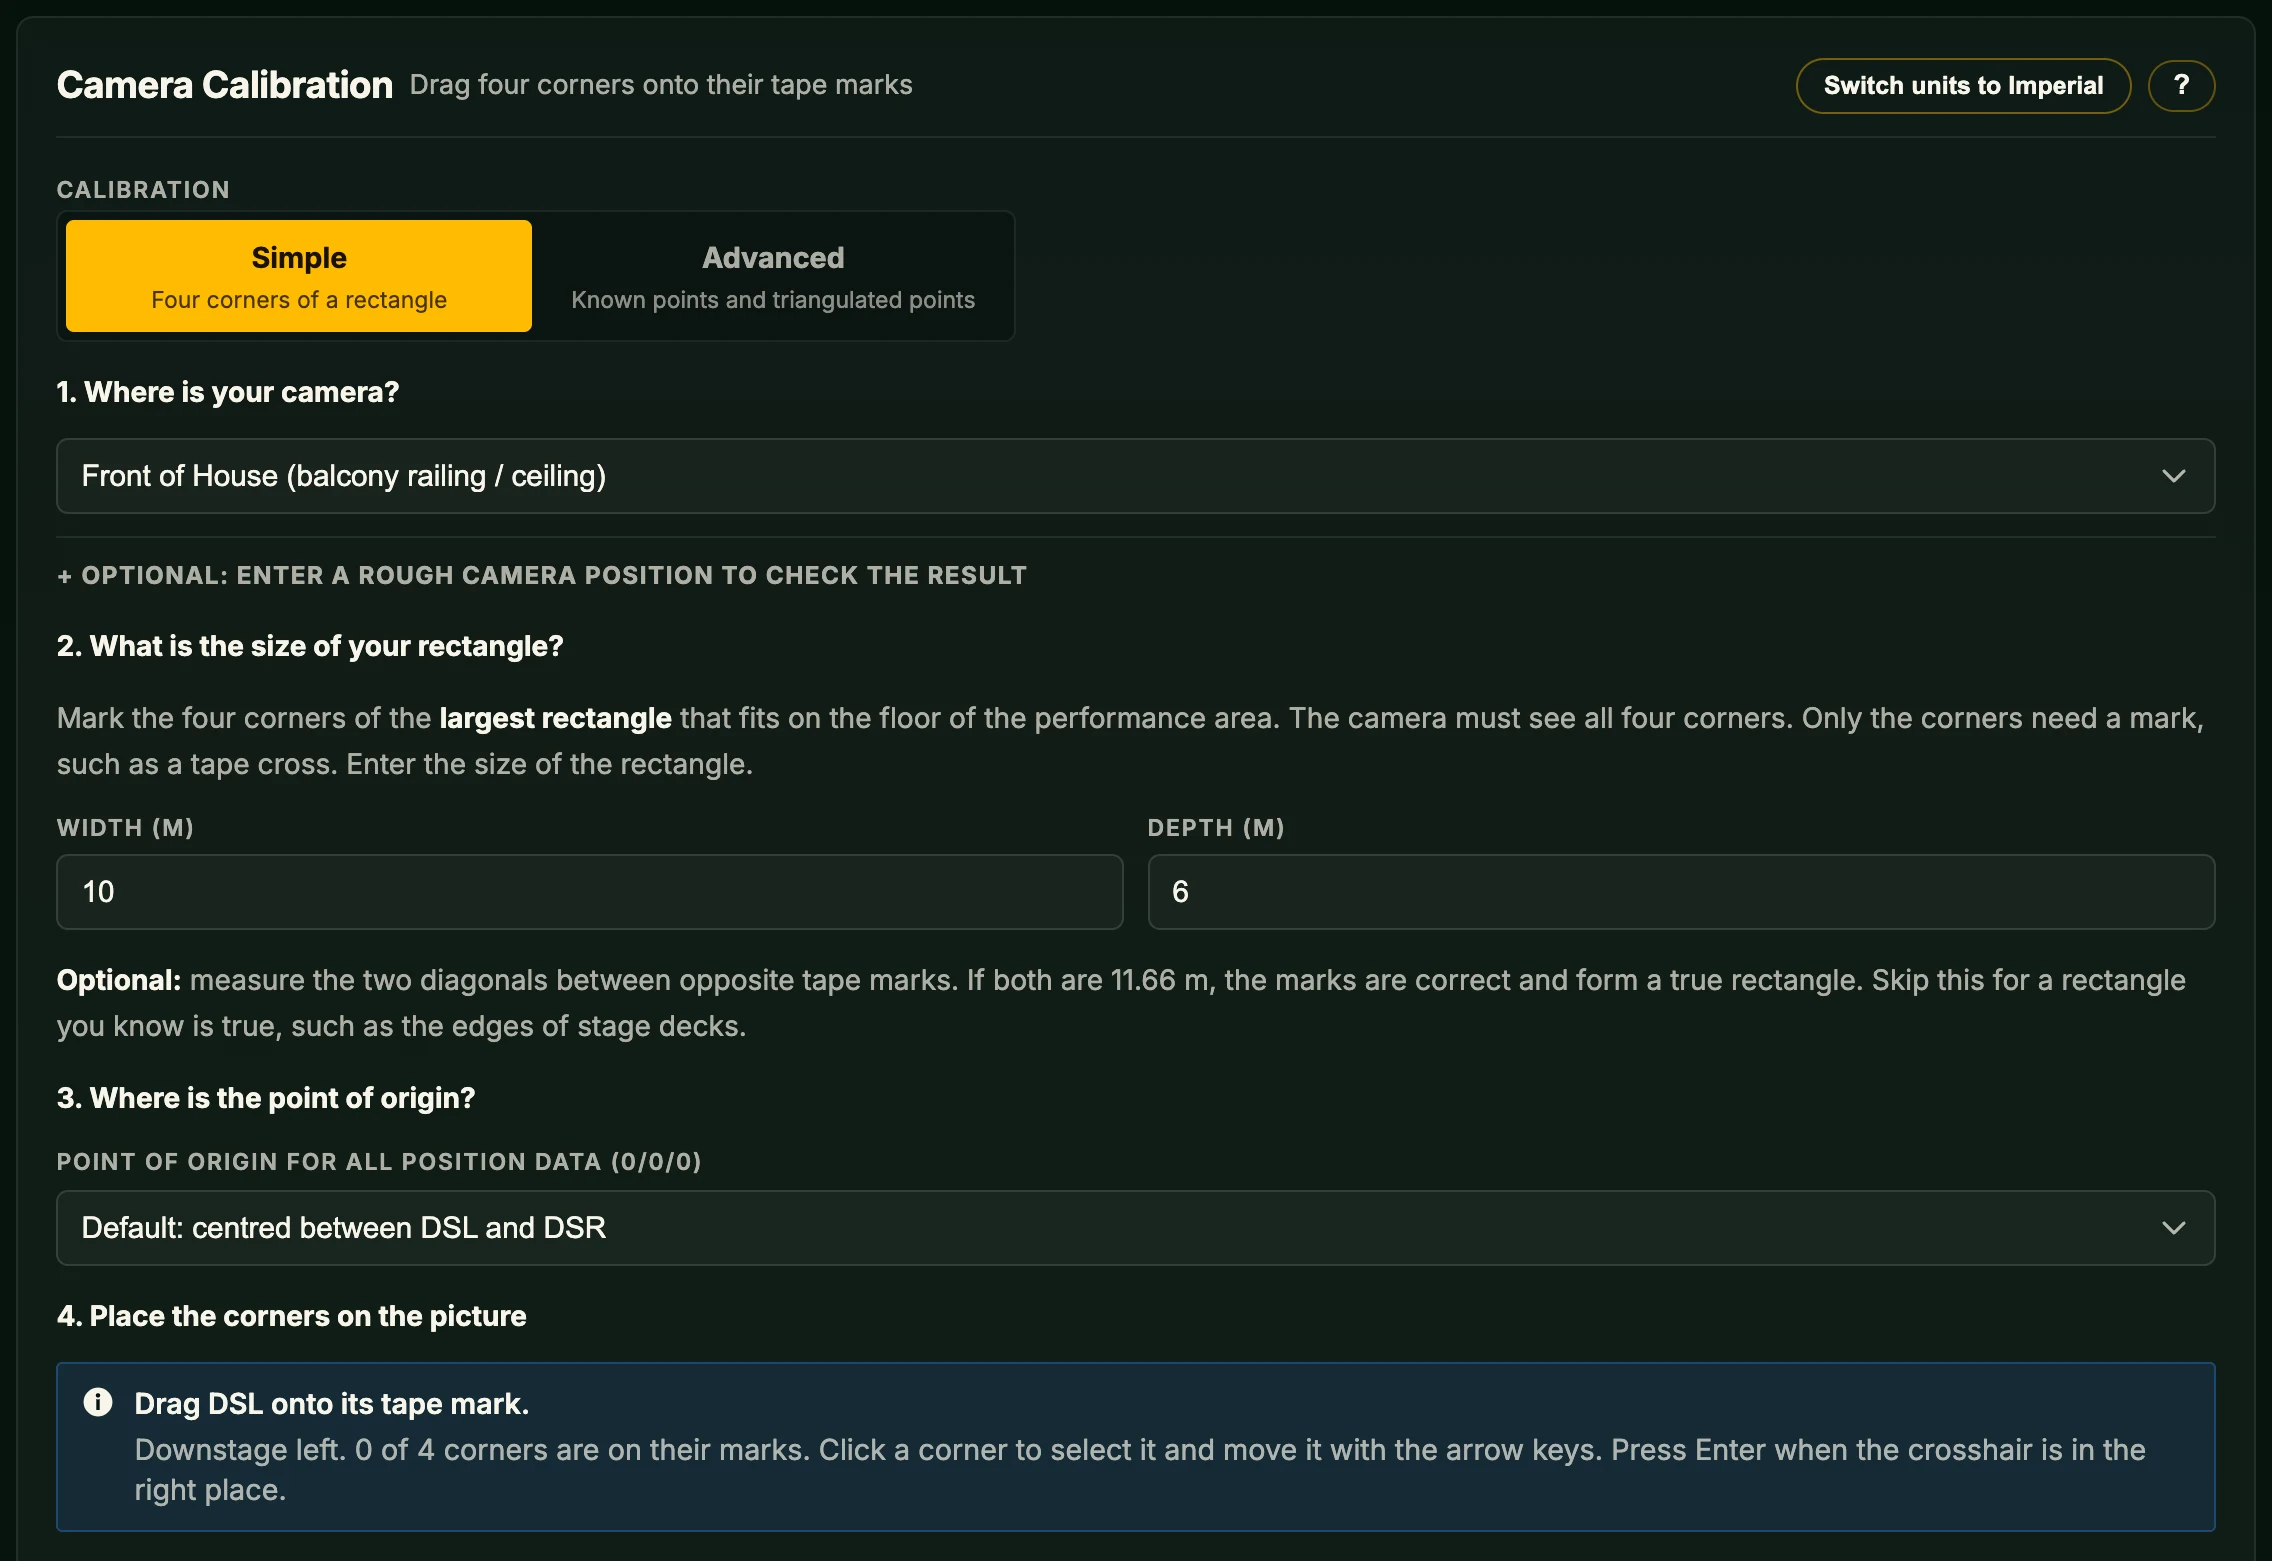
Camera Calibration
In Simple mode, fill in the first three questions:
- Where is your camera? – Front of House.
- What is the size of your rectangle? – width 10 m, depth 6 m.
- Where is the point of origin? – keep Default, centred between DSL and DSR.
Place the corners
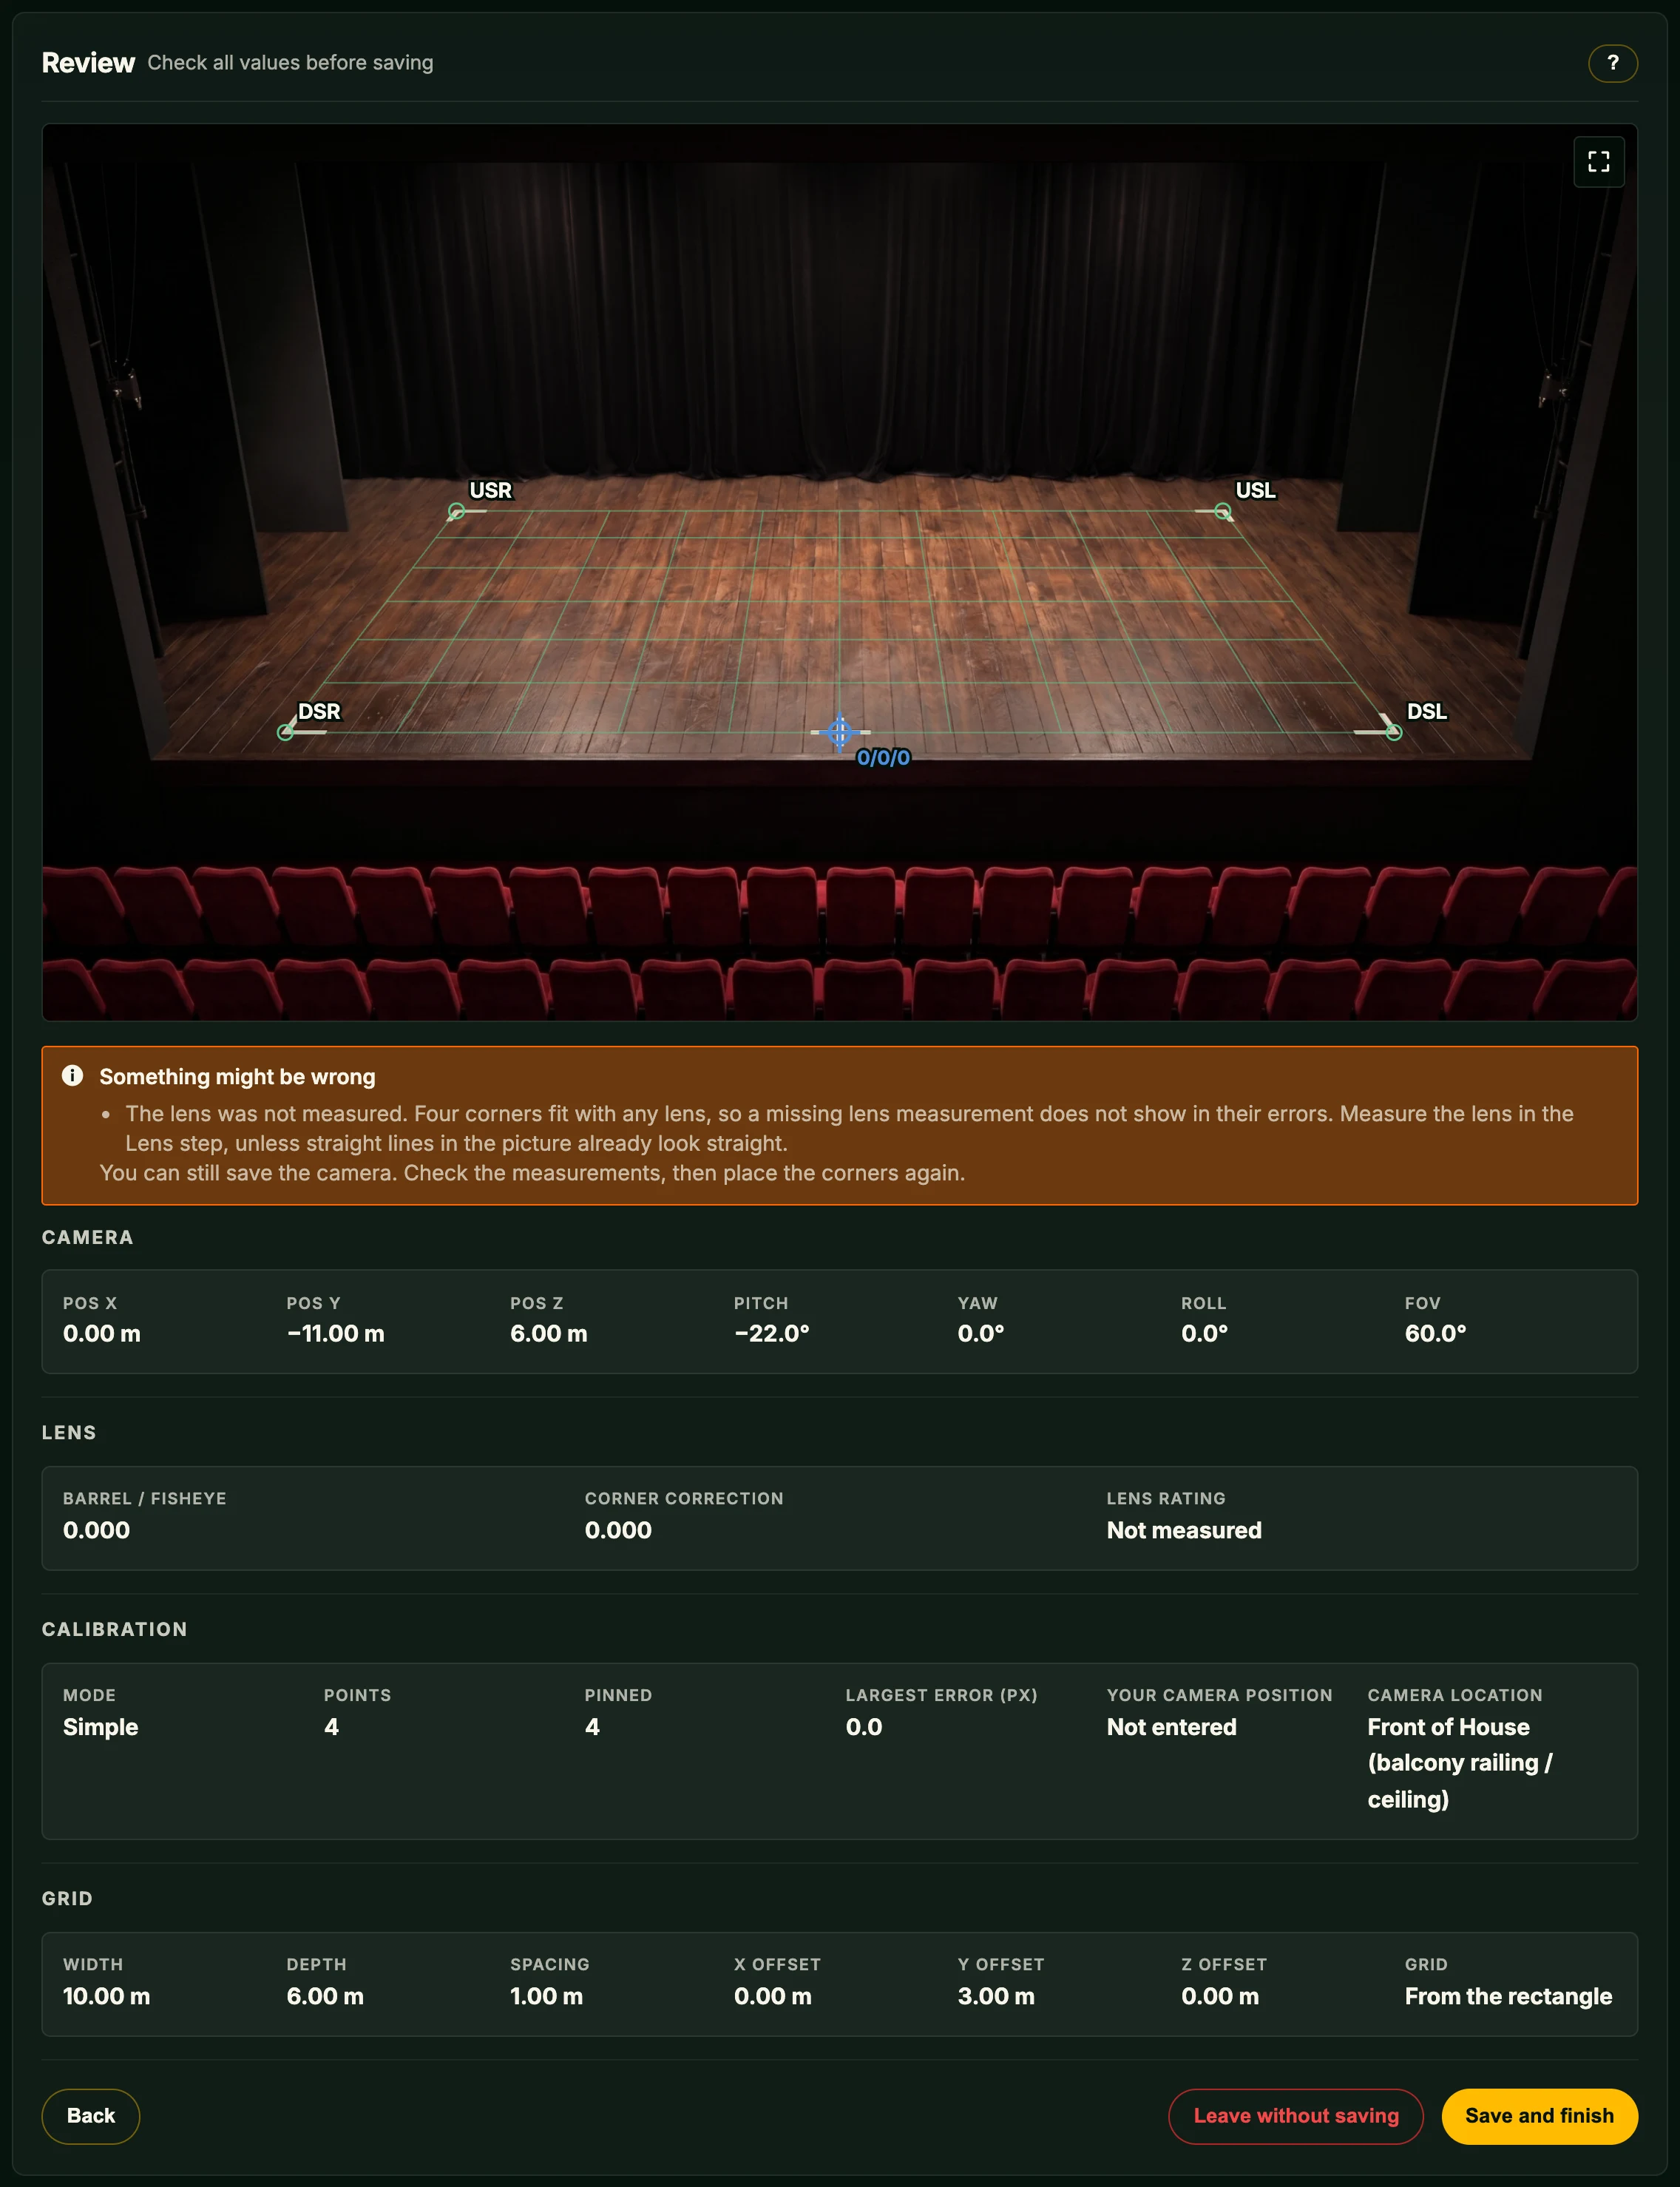
Drag each of the four corners – DSL, DSR, USR, USL – onto its tape mark. While you drag, a loupe shows the picture 4× larger; let go when its crosshair sits on the mark. Once all four are placed, the grid lies on the floor. Click Next.
Review
Check that the grid lies on the floor and click Save and finish. The note that the lens was not measured is expected here. Then move the marker along the tape lines: it should follow them.
The Festival and Concert pictures were taken with a wide lens. To practise the Lens step as well, calibrate one of them: draw lines along edges that are straight on stage, such as the tape and the deck seams, before you place the 12 × 6 m corners.
Next steps
- Core Concepts – the terms used in the rest of the manual.
- Quick Start – set up a real camera on a real stage.
- How To – move lights from grandMA2, grandMA3, ETC Eos or ChamSys MagicQ.
1. Xbox is a trademark of the Microsoft group of companies. OpenFollow is not affiliated with or endorsed by Microsoft.
2. PlayStation is a registered trademark or trademark of Sony Interactive Entertainment Inc. OpenFollow is not affiliated with or endorsed by Sony.