
Manual / Getting Started
Core Concepts
The terms here recur throughout the manual and the web interface.
How it fits together
- CameraThe video feed of the stage.
- OpenFollow stationAn operator moves markers over the picture with a gamepad, keyboard, mouse or OSC.
- Position dataPSN, OSC, OTP and RTTrPM, in metres from the Reference Point.
- Your systemsLighting consoles, media servers, spatial audio.
OpenFollow is a position generator, not a fixture controller: it sends no DMX, Art-Net or sACN. Your console or media server receives the positions and decides what to do with them. One station handles one camera; several stations can track the same stage from different angles.
The Reference Point
Every position OpenFollow sends is measured from one physical point on stage, the Reference Point: the (0, 0, 0) of your show. If the venue or the console already has an origin, use it; otherwise the centre of the downstage edge is a sensible default.
Mark the Reference Point physically on stage before you start. The Setup Wizard asks where it sits relative to the calibration rectangle.
Coordinate system
OpenFollow uses the PSN convention everywhere – in the Setup Wizard, in the web interface and on the wire. Units are metres.
| Axis | Positive direction |
|---|---|
X | Stage left – the audience’s right |
Y | Upstage, away from the audience |
Z | Up, height above the stage floor |
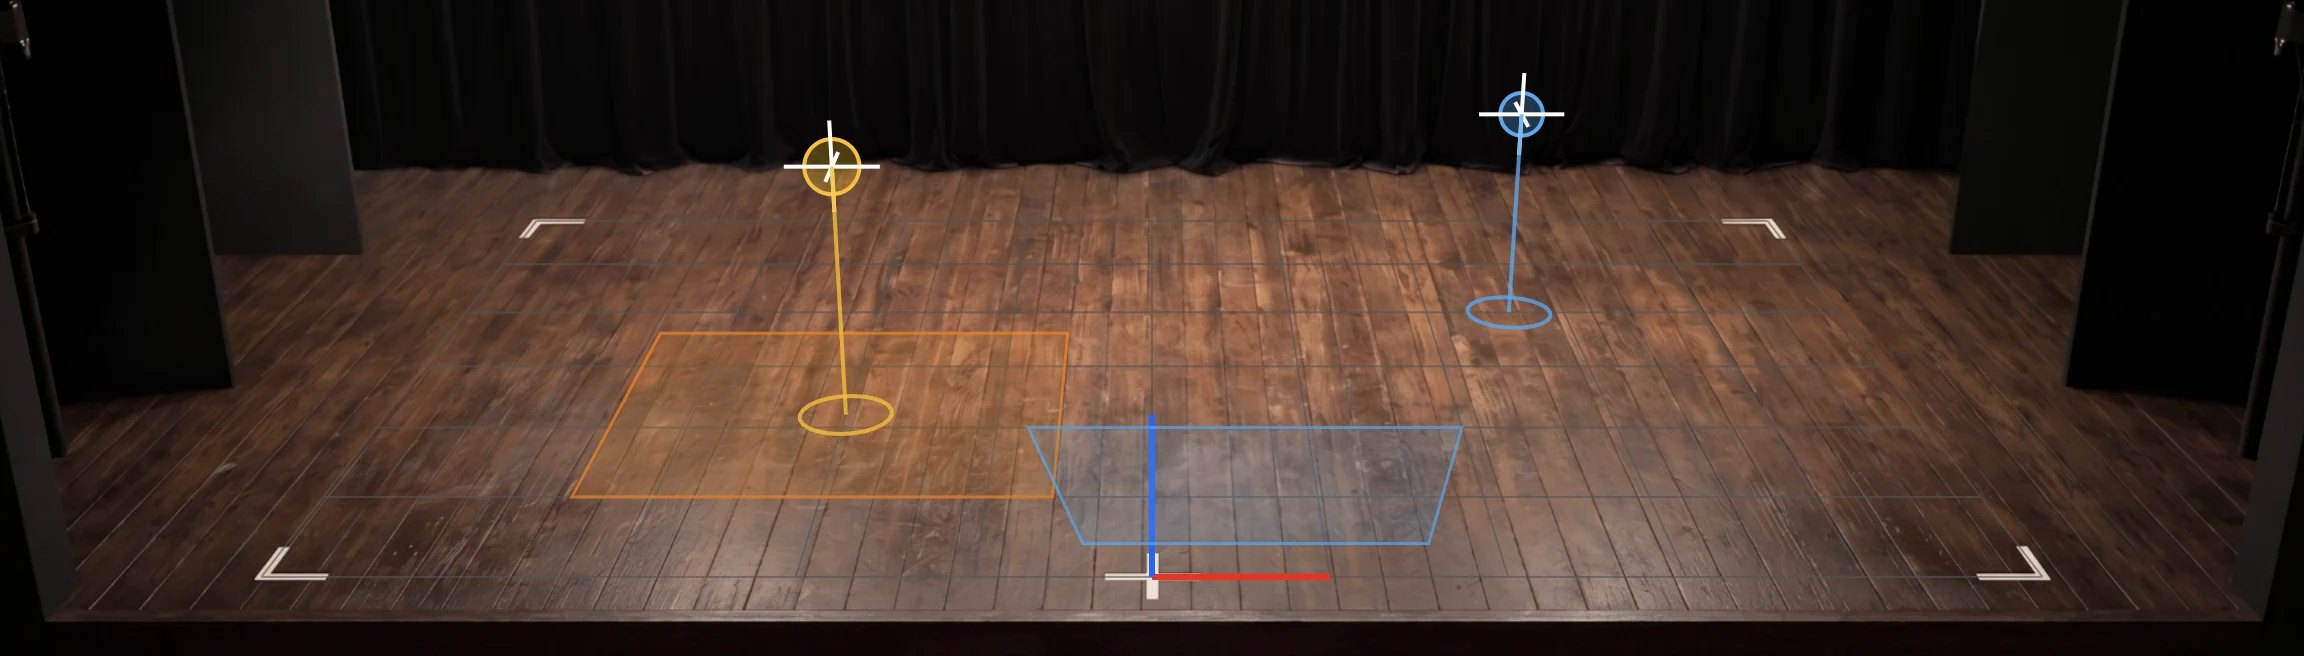
Consoles with other axis conventions are handled in the OSC message template – see OSC Transmitters.
The Grid
The Grid is a flat rectangle on the stage floor, drawn over the video so you can see where stage coordinates land in the picture. In Simple calibration the taped rectangle you measure becomes the grid. It is a visual aid, not a fence: anything the camera sees can be tracked. The interactive Positioning the Camera sketch shows how grid, camera and field of view fit together.
The Video Feed
OpenFollow can only track what the camera sees, so the feed decides how well tracking works:
- Position. Front of house, framing the whole performance area without much dead space around it.
- Image quality. Sharp and well exposed. Low light, haze, backlight and blackouts are the most common problem; a light-sensitive or IR camera helps.
- Lens. Rectilinear where possible. For a wide or fisheye lens, the Setup Wizard’s Lens step measures the distortion and bends the overlay to match.
- Latency. Operators follow what they see, so keep the video path short.
Recommended angle
Aim for 25° to 55° below horizontal, near the stage centreline. Flatter makes depth hard to read, steeper makes height hard to read. The Positioning the Camera tool flags angles outside this range.
Markers
A marker is a tracked point in 3D space with an ID (1 and up) and a name. Usually one marker follows one performer, but it can follow any object – a prop, a flying piece, a truss. A station controls the markers its inputs move and sends them; it views the markers drawn on its Operator Screen, which can include markers controlled by another station. See 3D Markers.
Controllers and inputs
A gamepad is the usual way to move a marker; a keyboard, mouse, 3D Mouse, Touch Remote Experimental or incoming OSC works too, and several can be active at once. Controller Slots assigns each gamepad or 3D Mouse to a marker. See Gamepad, Keyboard & OSC.
Output protocols
- PSN – PosiStageNet, multicast. The tracking protocol most lighting consoles understand.
- OSC – one message per OSC Transmitter, each with its own address, template and trigger. Used for ETC Eos, QLab, spatial audio and anything else that listens to OSC. Trigger zones also send OSC when someone enters, leaves or stays in an area.
- OTP Experimental – Object Transform Protocol, ANSI E1.59.
- RTTrPM Experimental – for some immersive audio systems.
All of them can run at the same time. Next: set up a camera with the Quick Start.